There's a ton of youtube videos that show how to use image plates, stampers, and scrapers, so I'm not going to bother repeating what's already been shown. Just search for "Konad" and you'll see over 600 results!
With that in mind, I'm going to walk you through my full manicure routine. This is when I'm doing the real deal. Often if I'm just doing a quick polish change a bunch of these steps will be bypassed.
- Remove old nail polish, usually using a cotton pad and 100% acetone. The nail polish removers (such as those from Cutex) that are blended with other ingredients work much slower, and I'm impatient and lazy. Plus, if I've used any glitter the Cutex removers are a royal PITA, if you'll pardon my language.
- File nails as needed. I use a glass file. I find that other files leave little stragglies hanging off of my nail so I don't have a clean, nice edge after I paint.
- Apply cuticle remover, let soak in a minute. I haven't found any one remover that I like best, but I also haven't tried very many. I seem to not be all that picky in this (one) regard. (Lord knows I'm picky enough with almost everything else!)
- GENTLY push cuticles back using a rubber-tipped plastic cuticle pusher like this one.
- Wash hands with soap. Believe it or not, the soap you choose wash your hands with is crucial. The moisturizing soap I keep in the kitchen leaves too many oils on my skin, so nail polish doesn't adhere to the nail and winds up peeling off within a day. The Bath and Body Works anti-bacterial moisturizing soap I have in my bathroom cleans much better, so my manicure lasts longer.
- Get all your supplies ready and within reach. This will include: base coat, base color, design color, top coat(s), nail polish remover, paper towel, cotton pad, image plate, scraper, and stamper. If any of your polishes need thinning (my top coat does regularly), this is a good time to take care of that.
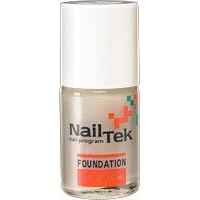
- Apply base coat. My favorite is Nailtek Foundation II Ridge-Filling Nail Strengthener. I prefer base coats that are milky looking like this one. I find they protect my nail better and polish adheres better to them than with clear base coats.
- Apply base color.
- Apply quick-dry top coat. I use Seche Vite, but there's a bit of strategy involved. More on this some other time (probably tomorrow).
- Set a kitchen timer for 5-10 minutes. I usually set it to 7.
- Get ready to start doing your images. I fold a paper towel in quarters and put it underneath the image plate so that no polish leaks through to the table and the plate doesn't scratch anything. I also douse a cotton pad heavily in nail polish remover and leave it by me so I can easily and quickly clean the plate and the stamp between each image. I clean the scraper a couple times throughout the process, too.
- The tutorials show the basic concept of how to transfer the image, but two things I've learned are (1) you don't need to paint polish all over the image. A thick swipe across the top will do it. When you scrape from the top to the bottom of the image, the polish will spread on its own. This helps conserve your polish and keeps your paper towel from becoming a ridiculous mess. (2) Don't lay your hand flat on a table and blindly apply the stamp in a downward motion. Rather, hold up your hand with your palm facing you, and apply the stamp to your nail while you're looking at the image on the stamp so you can see how it's aligned.
- Once all ten fingers are done, do a final quick clean of the plate and the stamper.
- Here's the last trick I've picked up. If you're using Seche Vite as your top coat, only use it to seal in the image if you're doing your images shortly after doing your base color. Otherwise you're using Seche Vite over dry polish, which causes it to peel. If you're doing your designs a few hours or a day or two after doing your base color, don't use Seche Vite. I reach for Sally Hansen No Chip in this case. You can, if you want, apply Seche Vite on top of the other base coat. The point is just that you can't use Seche Vite on dry polish.
- While waiting for the top coat to dry (usually I set a timer for about 10 minutes if I've used Seche Vite, or 20 minutes if a regular top coat), grab that cotton pad that you were using to clean the image plate. Fold it in quarters and use the corner and edges to clean off the polish from the image plate that's gotten all over the skin around your nail. Careful not to get too close to the nail, though - you don't want to ruin your manicure!

Zoya Dita with China Glaze Awaken, Konad plate M70


